FREE SHIPPING OVER $50
How to Make Elderberry Wine at Home: Step-by-Step Recipe
Crafting your own elderberry wine at home is a rewarding and enjoyable experience. Not only do you get to savor a delicious homemade beverage, but you also gain the satisfaction of creating something unique from scratch. This guide will take you through a detailed, step-by-step elderberry wine recipe, ensuring you produce a wine that’s both flavorful and rich in nutrients.
What is Elderberry Wine?
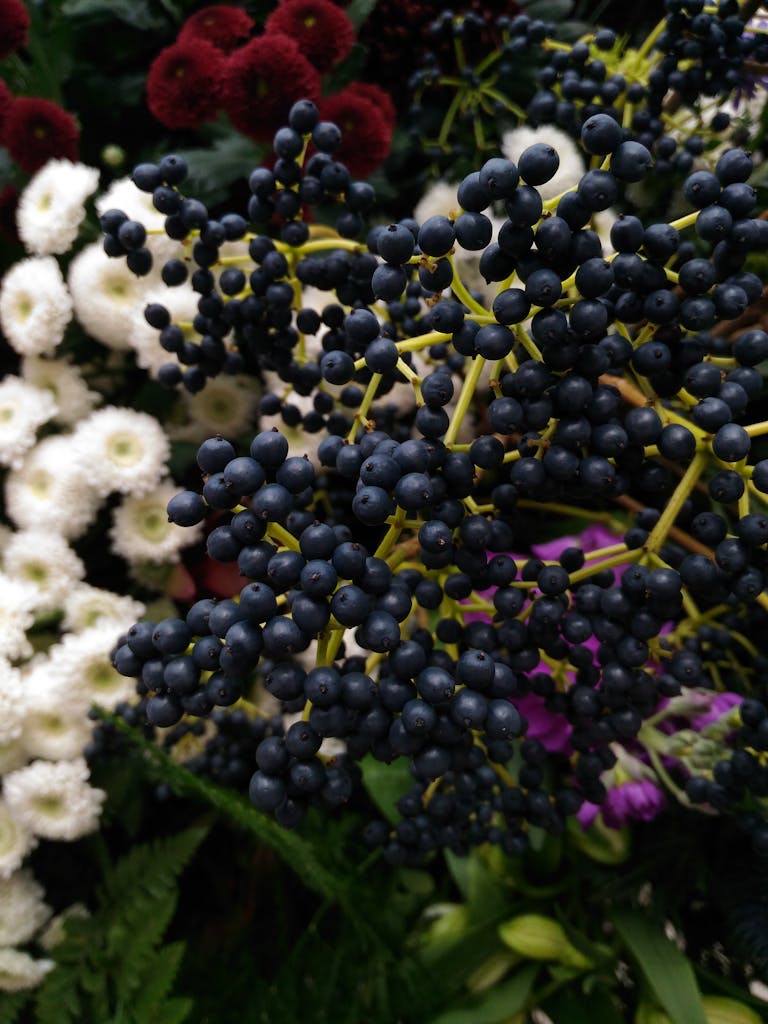
Elderberry wine is a delightful drink made from the small, dark berries of the elderberry plant. These berries are renowned for their rich antioxidant content and numerous health benefits. The wine itself is often described as having a deep, earthy flavor with hints of tartness, making it a perfect complement to various dishes or simply enjoyed on its own.
Benefits of Elderberries
Elderberries are packed with vitamins, antioxidants, and other nutrients that contribute to overall health and wellness. Here are some key benefits:
- Immune System Boost: Elderberries are rich in vitamin C and antioxidants, which help to strengthen the immune system and ward off illnesses.
- Anti-Inflammatory Properties: The anthocyanins in elderberries have anti-inflammatory effects, helping to reduce inflammation and pain in the body.
- Heart Health: Elderberries contain flavonoids that support cardiovascular health by reducing bad cholesterol levels and improving blood circulation.
- Digestive Health: The high fiber content in elderberries aids digestion and promotes a healthy gut.
- Skin Health: Elderberries’ antioxidant properties help protect the skin from damage caused by free radicals, promoting a healthy and youthful complexion.
How to Make Elderberry Wine
Ingredients:
- 3 pounds of fresh elderberries (or 1.5 pounds of dried elderberries)
- 2.5 pounds of sugar
- 1 gallon of water
- 1 teaspoon of acid blend
- 1 teaspoon of pectic enzyme
- 1 teaspoon of yeast nutrient
- 1 Campden tablet (optional, for sterilization)
- 1 packet of wine yeast (recommended: Montrachet)
Equipment:
The equipments below are generally easy to find. You can find them in homebrewing supply stores online.
- Large fermenting bucket
- Straining bag
- Airlock and bung
- Siphon tubing
- Wine bottles and corks
- Hydrometer (for measuring sugar levels)
- Acid test kit (for measuring acidity)
- Fine mesh sieve or press bag
Prep Time: 2 hours
Initial Fermentation: 1 week
Secondary Fermentation: 4-6 weeks
Aging: 6 months (minimum)
Instructions
- Prepare the Elderberries: Begin by thoroughly cleaning the elderberries. Remove any stems and leaves, as these can impart a bitter taste to your wine. For easier de-stemming, consider freezing the clusters first. Place the berries in a large fermenting bucket.
- Boil the Water: Boil one gallon of water and pour it over the elderberries in the fermenting bucket. This helps to extract the juice and kill any wild yeast or bacteria. Let the mixture cool to room temperature.
- Add Sugar and Other Ingredients: Stir in the sugar until completely dissolved. Then add the acid blend, pectic enzyme, and yeast nutrient. The acid blend helps to balance the acidity of the wine, ensuring it has a pleasant taste and proper fermentation. If you’re using a Campden tablet for sterilization, crush and add it now. Cover the bucket and let it sit for 24 hours.
- Add the Yeast: After 24 hours, add the wine yeast. It’s crucial to follow the instructions on the yeast packet for rehydration and activation. Once the yeast is ready, pour it into the mixture and stir well.
- Initial Fermentation: Seal the fermenting bucket with the airlock and bung. Allow the mixture to ferment for about a week, stirring daily. During this time, the elderberries will release their juice and flavors into the mixture.
- Strain the Mixture: After the initial fermentation period, strain the mixture through a straining bag into another clean fermenting bucket. Squeeze the bag to extract as much juice as possible. Discard the pulp.
- Secondary Fermentation: Fit the airlock and bung onto the fermenting bucket. Allow the wine to ferment for another 4-6 weeks, or until fermentation has completely stopped. You’ll know it’s ready when bubbles stop rising through the airlock.
- Racking the Wine: Carefully siphon the wine into clean wine bottles, leaving any sediment behind. This process, known as racking, helps to clarify the wine.
- Aging: Cork the bottles and store them in a cool, dark place. Allow the wine to age for at least 6 months to develop its full flavor. The longer you wait, the better it will taste.
Understanding Fermentation and Acidity
Fermentation is the process where yeast converts the sugars in the elderberry mixture into alcohol and carbon dioxide. This crucial step determines the alcohol content and flavor of your wine. Stirring the mixture daily during the initial fermentation ensures that the yeast is evenly distributed and active.
Using a Hydrometer: Measure the sugar levels (Brix) using a hydrometer. To adjust sugar levels:
- (Target Brix – Initial Brix reading) x 0.125 x gallons of juice = pounds of sugar to add. For example, if your initial Brix is 17 and you want it to be 24 for 3 gallons of juice, you need to add approximately 2.6 pounds of sugar.
Testing and Adjusting Acidity: Use an acid test kit to measure the total acidity (TA) of your juice. Aim for a TA between 6 and 10 grams per liter. If needed, add tartaric acid using the formula: To increase TA by 1 gram per liter, add 4 grams of tartaric acid per gallon.
Tips for the Best Homemade Elderberry Wine
- Quality Ingredients: Always use the freshest elderberries and high-quality ingredients. This significantly affects the taste and quality of your wine.
- Clean Equipment: Sterilize all equipment before use to prevent contamination.
- Preventing Wild Yeast Contamination: Add a pinch of potassium metabisulfite (K-meta) to the juice to prevent wild yeast contamination.
- Temperature Management: Monitor the temperature of the fermenting juice daily to ensure optimal fermentation conditions.
- Patience: Good wine takes time. Be patient during the fermentation and aging processes to achieve the best results.
FAQs
Is elderberry wine good for health?
Yes, elderberry wine retains many of the beneficial properties of the berries, including antioxidants and vitamins that can boost your immune system.
How long does it take to make elderberry wine?
The entire process, from preparation to aging, can take up to a year. The active preparation and fermentation stages take about 6-8 weeks, but the wine needs to age for several months for the best flavor.
Can I use dried elderberries?
Absolutely. Dried elderberries can be used if fresh ones are not available. Adjust the quantity accordingly as dried berries are more concentrated.
Conclusion
Making elderberry wine at home is a delightful and fulfilling endeavor. With this step-by-step recipe, you’ll master the art of creating a delicious and healthful homemade elderberry wine. Remember, the key to a great wine is patience and quality ingredients. Cheers to your homemade wine adventures!

Elderberry Wine Recipe
This step-by-step elderberry wine recipe guides you through preparing, fermenting, and aging a delicious homemade wine. You’ll use fresh or dried elderberries, sugar, water, and various additives to create a rich, flavorful wine over several months. The process includes initial and secondary fermentation followed by aging for at least six months. You can also use this recipe to make other fruit wines by swapping elderberries with blackberries, blueberries, or raspberries.
Equipment
- Large fermenting bucket
- Straining bag
- Airlock and bung
- Siphon tubing
- Wine bottles and corks
- Hydrometer (for measuring sugar levels)
- Acid test kit (for measuring acidity)
- Fine mesh sieve or press bag
Ingredients
- 3 pounds of fresh elderberries (or 1½ pounds of dried elderberries)
- 2½ pounds of sugar
- 1 gallon of water
- 1 tsp of acid blend
- 1 tsp of pectic enzyme
- 1 tsp of yeast nutrient
- 1 Campden tablet (optional, for sterilization)
- 1 packet of wine yeast (recommended: Montrachet)
Instructions
- Begin by thoroughly cleaning the elderberries. Remove any stems and leaves, as these can impart a bitter taste to your wine. For easier de-stemming, consider freezing the clusters first. Place the berries in a large fermenting bucket.
- Boil one gallon of water and pour it over the elderberries in the fermenting bucket. This helps to extract the juice and kill any wild yeast or bacteria. Let the mixture cool to room temperature.
- Stir in the sugar until completely dissolved. Then add the acid blend, pectic enzyme, and yeast nutrient. The acid blend helps to balance the acidity of the wine, ensuring it has a pleasant taste and proper fermentation. If you’re using a Campden tablet for sterilization, crush and add it now. Cover the bucket and let it sit for 24 hours.
- After 24 hours, add the wine yeast. It’s crucial to follow the instructions on the yeast packet for rehydration and activation. Once the yeast is ready, pour it into the mixture and stir well.
- Seal the fermenting bucket with the airlock and bung. Allow the mixture to ferment for about a week, stirring daily. During this time, the elderberries will release their juice and flavors into the mixture.
- After the initial fermentation period, strain the mixture through a straining bag into another clean fermenting bucket. Squeeze the bag to extract as much juice as possible. Discard the pulp.
- Fit the airlock and bung onto the fermenting bucket. Allow the wine to ferment for another 4-6 weeks, or until fermentation has completely stopped. You’ll know it’s ready when bubbles stop rising through the airlock.
- Carefully siphon the wine into clean wine bottles, leaving any sediment behind. This process, known as racking, helps to clarify the wine.
- Cork the bottles and store them in a cool, dark place. Allow the wine to age for at least 6 months to develop its full flavor. The longer you wait, the better it will taste.
Notes
Prep Time: 2 hours
Initial Fermentation: 1 week
Secondary Fermentation: 4-6 weeks
Aging: 6 months (minimum)
Related Articles
- Hibiscus Tea Effect on Kidneys: Benefits and Potential Risks
- Easy Homemade Hibiscus Tea Recipe (Hot and Cold)
- Celsius Energy Drinks and Drug Tests: Reasons for False Positives
- Prime Energy Drinks: How Much Caffeine Are You Drinking?
- Heavy Whipping Cream Recipe: Gluten-Free
- Fermented Garlic Honey: Health Benefits and Recipes
- The Perfect Homemade Whipped Cream Recipe: Gluten-free
- Washing Fruit with Baking Soda: A Simple Guide to Remove Pesticides and Bacteria