FREE SHIPPING OVER $50
Knees Caving In When You Squat? Here’s the Real Reason—and the 3 Fixes Pros Never Skip

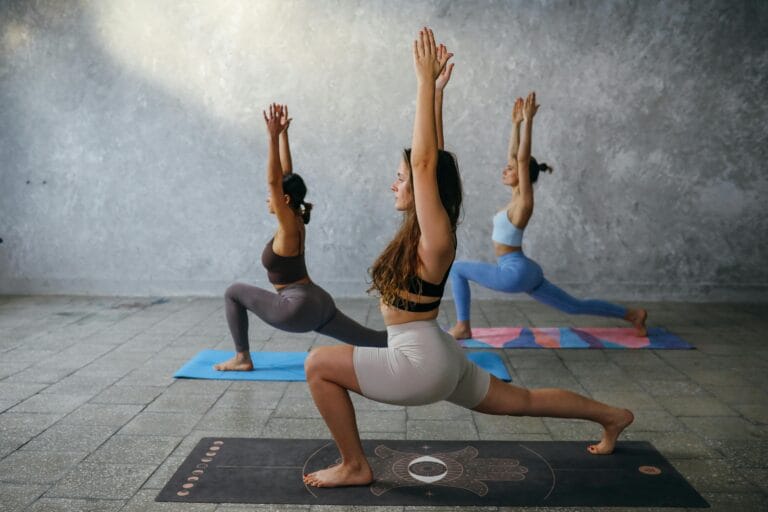
It’s one of the most common mistakes in the gym, and yet, it’s one of the most dangerous: that moment when you descend into a squat, and your knees dive inward, collapsing toward the centerline of your body. If this happens to you, you’ve likely tried to “think about pushing your knees out,” only for them to stubbornly cave in again. This flaw in squat form, known as knee valgus, isn’t just a sign of poor technique; it’s a bright red flag indicating a fundamental weakness elsewhere in your body.
The problem is rarely the knee itself. When your knees cave in, it points to a critical failure at the hip—specifically, an inability of your largest stabilizing muscles to do their job. This instability doesn’t just look bad; it places massive, unnatural stress on your knee joints, dramatically increasing your risk of acute injury and chronic knee pain. Thankfully, the fix doesn’t involve complex equipment. We’re revealing the real reason behind knee valgus and the 3 simple fixes that fitness pros and physical therapists rely on to immediately stabilize the hip and correct your squat form.
The Real Reason Your Knees Cave In: Glute Medius Failure
When your knees cave in during a squat, the structural failure originates at the top of your kinetic chain: the hip. The culprit is almost always weakness and dysfunction in a crucial, often-overlooked muscle: the gluteus medius (Glute Med).
Glute Medius: The Unsung Stabilizer
The Glute Med is the muscle on the side of your hip, and its primary job is hip abduction (moving the leg away from the body) and, most importantly, hip stabilization. When you descend into a squat, the Glute Med should fire strongly to externally rotate your thigh and hold your knee in line with your foot.
The Breakdown
If the Glute Med is weak or dormant (often called glute amnesia due to excessive sitting), it fails to stabilize the hip joint. Consequently, the stronger inner thigh muscles (adductors) take over and pull the femur (thigh bone) inward, causing the knee to collapse. Since the foot is planted, the only way for the leg to move is for the knee to drift inward—a dangerous, unnatural movement pattern that sacrifices performance and risks injury.
Fix 1: Activation and Awareness (The Glute Warm-Up Switch)
Before you put any load on your body, you must wake up the lazy Glute Med and establish the mind-muscle connection. Fitness pros call this “priming” or “activating” the glutes.
The Clamshell Exercise
The Clamshell is the ultimate Glute Med activation move because it isolates the muscle responsible for external hip rotation.
- How to do it: Lie on your side with your knees bent and your feet stacked. Place a mini-resistance band just above your knees (optional, but highly recommended). Keep your feet stacked and together, and slowly lift your top knee toward the ceiling, externally rotating the hip. Do not let your upper body rock backward.
- The Goal: Perform 2 sets of 15 to 20 repetitions on each side as part of your warm-up. The final reps should feel like a small, burning sensation in the side of your glute. This signals successful activation.
The Mind-Muscle Connection
While squatting, constantly repeat the cue: “Screw your feet into the floor.” This mental cue encourages subtle external rotation at the hip, prompting the Glute Med to fire and stabilize the knee.
Fix 2: Motor Control and Technique (The Banded Squat)
Activation is only the first step. Next, you need to retrain your nervous system to keep the Glute Med firing throughout the entire squat movement. This is where the mini-resistance band becomes an invaluable fitness tool.
The Banded Squat
Placing a band around your knees provides constant external tension, forcing your Glute Med to work harder simply to prevent the band from pulling your knees in.
- How to do it: Place a mini-resistance band just above your knees. Stand with your feet hip-width apart. As you descend into the squat, actively and aggressively push your knees out against the band’s resistance. The band should never become loose. Focus on keeping your knees tracking directly over your second or third toe.
- The Goal: Perform 3 sets of 10 slow repetitions, focusing entirely on maintaining tension against the band. You should feel intense fatigue in the side of your hips. This drill is excellent for building the necessary strength and motor control for a perfect, injury-free squat.
The Foot Check
Another vital component of motor control is ensuring your feet are planted correctly. During the squat, your weight should be distributed evenly through the heel and mid-foot, not shifting onto the inside arch. If your arch collapses (pronation), it facilitates the inward knee collapse.
Fix 3: Isolation and Strength (The Single-Leg Builder)
Once you’ve mastered activation and motor control with the band, you must increase the functional strength of the Glute Med to handle heavier loads. The best way to do this is by eliminating the other leg—using single-leg exercises.
The Glute Bridge Progression
The traditional Glute Bridge is fine, but the Single-Leg Glute Bridge forces the standing Glute Med to work overtime to stabilize the pelvis and prevent rotation.
- How to do it: Lie on your back with knees bent. Lift one leg straight toward the ceiling. Push your hips upward by driving through the heel of your grounded foot. As you lift, actively keep your hips level—do not let the non-working side drop.
- The Goal: Perform 2 to 3 sets of 10 to 12 repetitions on each side. The focus here is on hip stability and height, not speed. This move builds the unilateral (single-sided) strength required for complex movements like running and lunging.
The Lateral Band Walk
This move directly isolates and builds endurance in the Glute Med in a functional, standing position.
- How to do it: Place the resistance band around your ankles. Get into a slight athletic stance (knees slightly bent). Take small, deliberate steps laterally (sideways), leading with the heel. Keep your feet pointed straight ahead and maintain constant tension on the band. Never let your feet come completely together.
- The Goal: Walk 10 steps to the right, then 10 steps back to the left. Perform 3 sets total. This builds the endurance that prevents your knees from caving in when you are fatigued deep into a workout.
The Pro’s Protocol: Never Skip These Steps
The reason fitness pros never skip these fixes is that they treat the body as an interconnected system. They understand that a perfect squat form is built from the ground up, starting with stable hips.
Daily Consistency for Longevity
Integrate Fix 1 (Clamshells) into every warm-up, even on non-squat days. Consistent activation creates muscle memory. Use Fix 2 (Banded Squats) as a warm-up drill before your heavy sets, effectively reminding your glutes what their job is before they take on the load. Finally, use Fix 3 (Single-Leg Builders) two to three times per week to build the necessary baseline strength that makes the perfect squat form automatic.
By adopting this simple three-part protocol, you move beyond merely thinking about pushing your knees out. You teach your Glute Medius to fire automatically, creating a solid, stable foundation that protects your knees, improves your overall performance, and allows you to load up your squat safely and effectively for maximum gains.
Final Thoughts
The painful truth is that knees caving in during a squat is a warning sign of a significant stability deficit rooted in the gluteus medius. But the good news is that this weakness is highly fixable. Implementing the 3 fixes pros never skip helps you empower your hips to maintain alignment. This strategic approach will not only perfect your squat form and allow for greater gains but, most importantly, will protect your knees from long-term injury and pain.
Related Articles
- Over 40? These 5 Warm-Up Mistakes Are Killing Your Gains—Here’s What to Do Instead
- Sitting Too Much? This One Move Reverses the Damage and Slows Aging, Say Experts
- Over 60? These 3 Exercises Rebuild Strength, Boost Energy, and Keep You Feeling Young
- Why Some Athletes Peak After 40—Neuroscience Reveals the Brain Advantage
- If You’re Over 45 and Can’t Pass These 4 Strength Tests, Your Mobility May Be at Risk