FREE SHIPPING OVER $50

I’m a Strength Coach—This 60-Second Wrist Drill Adds Pounds to Your Bench and Ends Pressing Pain

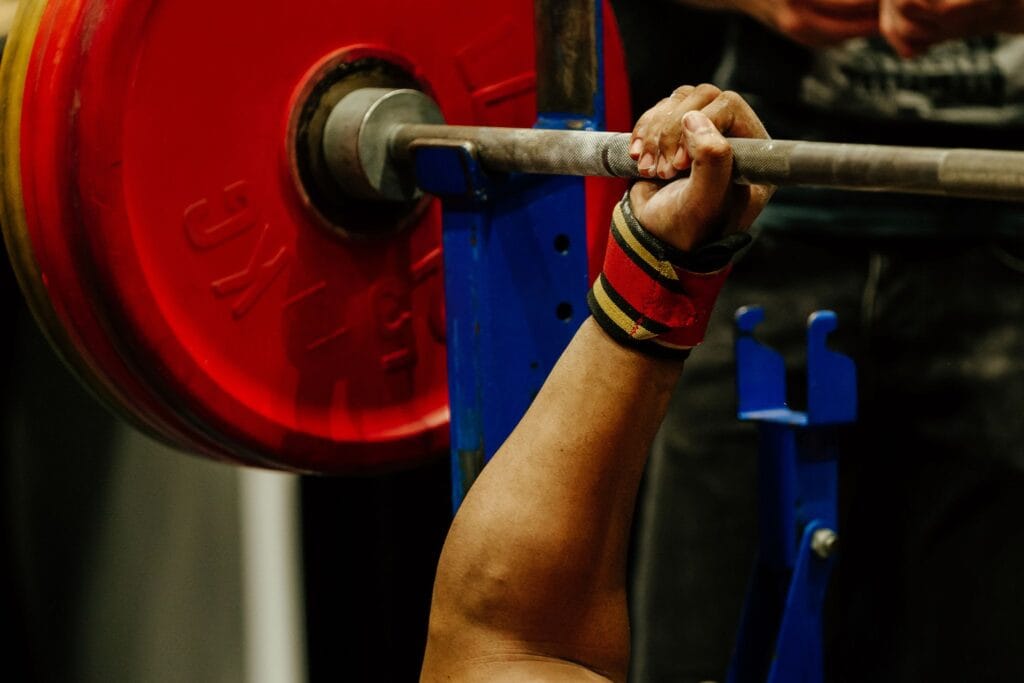
As a strength coach who has analyzed thousands of bench press reps, I see lifters waste months grinding through stubborn plateaus, completely unaware that their wrists are silently bleeding power off the barbell. When your wrists bend backward under a heavy load, you do not just strain your joints—you create a massive mechanical weak link that signals your nervous system to cut power output to your chest and triceps. Fortunately, fixing this structural flaw does not require buying expensive gear or spending hours on mobility work; taking just one minute before your pressing sessions can instantly stack your joints, eliminate wrist pain, and transfer maximum force straight into the bar.
The Hidden Biomechanics: Why Bent Wrists Kill Your Bench Press
Most lifters view the bench press strictly as a test of chest, shoulder, and triceps strength. While those major muscle groups supply the driving horsepower, your hands and wrists act as the final transmission link that delivers force to the barbell.
When your wrist hyperextends backward, the barbell shifts away from the sturdy bones of your forearm. Instead of sitting directly over your radius and ulna, the weight hangs back over the delicate carpal bones and surrounding tendons.
This mechanical deviation creates a severe lever arm at the wrist joint. Consequently, every pound of pressing force you generate must fight through an unnecessary torque point, irritating the flexor tendons and straining the wrist capsule.
“Think of your arm as a concrete pillar. If the top cap of the pillar sits sideways, the entire structure becomes unstable under load. Stacking your joints eliminates structural weakness.”
What Is “Force Leakage” and How Joint Stacking Fixes It?
Force leakage occurs whenever energy dissipates along an unstable joint instead of transferring directly into the target object. During a bench press, hyperextended wrists cause your forearms to push upward while the barbell pushes downward and backward, wasting valuable kinetic energy.
Joint stacking solves force leakage completely by aligning three critical anatomical points into a vertical straight line:
- The Barbell Axis: The center of weight sitting directly in the heel of your palm.
- The Wrist Joint: Positioned in a neutral, slightly extended alignment without rolling backward.
- The Forearm Bones: The radius and ulna standing vertical under the bar like supportive steel beams.
When these three structures align vertically, force travels in a straight line from your chest through your forearms and directly into the bar.
The 60-Second Wrist Reset: Step-by-Step Execution
This simple pre-press drill fires up your forearm flexors and activates the stabilizing muscles around your radio-carpal joint. Performing this movement right before your bench press sets primes your nervous system to maintain a rigid, neutral wrist position automatically.
Step 1: Establish Forearm Tension (15 Seconds)
Extend your right arm straight out in front of you at shoulder height with your palm facing forward. Use your left hand to gently pull your fingers back toward your body until you feel a firm stretch through your forearm flexors. Hold this position for 15 seconds while taking deep belly breaths.
Step 2: Engage the Opposing Muscles (15 Seconds)
Flip your hand down so your palm faces your body and your fingers point toward the floor. Gently apply pressure to the back of your hand with your opposite hand, stretching your forearm extensors for 15 seconds. This quick stretch releases built-up tension in the back of your wrist.
Step 3: Perform Isometric Radial Deviations (15 Seconds)
Make a tight fist with your right hand. Keep your forearm still and tilt your thumb upward toward the ceiling, contracting the top of your wrist hard. Press your left palm against the thumb side of your fist, resisting your own force so your right hand stays frozen in place. Contract firmly for 15 seconds to engage your lateral stabilizers.
Step 4: Perform Isometric Ulnar Deviations (15 Seconds)
Keep your fist tight, but now tilt your pinky finger downward toward the floor. Apply opposing pressure with your left hand against the bottom side of your fist, resisting movement for another 15 seconds. Switch hands and repeat the sequence for your left wrist.
How Proper Wrist Stacking Instantly Drives Neural Power Output
Your brain possesses protective safety mechanisms designed to prevent tissue damage during heavy exertion. One such mechanism involves specialized sensory organs called Golgi Tendon Organs, which monitor strain across your joints and tendons.
When your wrists bend back under heavy loads, these sensory receptors detect dangerous shearing forces across your carpal bones. To protect your connective tissue from tearing, your central nervous system throttles muscle activation to your primary movers, effectively dampening your pressing power.
By utilizing the 60-second wrist drill to stack your joints, you remove joint strain and disarm this internal safety brake. Your brain recognizes that your wrist joint is completely stable, allowing your central nervous system to recruit maximum motor units in your chest and triceps.
Collapsed Wrists vs. Stacked Wrists Comparison
Understanding how wrist position affects biomechanics helps you spot structural errors during your warm-up sets.
| Mechanical Factor | Collapsed (Hyperextended) Wrist | Stacked (Neutral) Wrist |
| Barbell Placement | High in the fingers or middle palm | Low in the meaty heel of the palm (meaty pad) |
| Primary Pressure Point | Delicate carpal bones and thumb joint | Thick radius and ulna forearm bones |
| Force Direction | Diagonal vector (wasted horizontal energy) | Pure vertical vector (100% direct force transfer) |
| Nervous System Response | Inhibits muscle drive to prevent joint damage | Maximizes motor unit recruitment to chest & arms |
| Long-Term Joint Impact | Chronic tendonitis and wrist strain | Pain-free pressing and long-term joint health |
Common Grip Mistakes That Cause Wrist Collapse
Even if you execute your pre-bench mobility drills faithfully, poor grip setup can instantly force your wrists back into hyperextension. Correcting these three common setup errors ensures your wrists stay locked in a strong, neutral position throughout every repetition.
1. Setting the Bar Too High in Your Palm
If you place the barbell across the top pad of your palm near the base of your fingers, the weight will naturally pull your hand open and fold your wrist backward as soon as you unrack the bar. Instead, rest the barbell diagonally across the meaty heel of your hand, running from the webbing between your index finger and thumb down to the base of your palm.
2. Using a “Suicide” or Thumbless Grip Unsafely
While some experienced lifters use a open grip to feel more comfortable, beginners often let the barbell roll back over their wrists when using this grip style. Wrapping your thumb securely around the bar allows you to crush the knurling with maximum grip force, which reflexively hardens your forearm musculature through a process known as irradiation.
3. Squeezing the Bar Too Loosely
Holding the barbell loosely allows the heavy steel to settle into whatever path gravity dictates, usually bending your wrists backward. Squeezing the bar as hard as humanly possible activates your forearm flexors and locks your wrist joint into a rigid structure that resists collapsing under heavy loads.
A Complete Warm-Up Routine for Pain-Free Pressing
Integrating wrist preparation into a comprehensive upper-body warm-up ensures your shoulders, elbows, and wrists work together seamlessly. Follow this structured sequence before your heavy bench press workouts:
- Upper-Back Activation (2 Sets of 15 Reps): Perform band pull-aparts or face pulls to fire up your rear deltoids and upper back stabilizers.
- Rotator Cuff Activation (2 Sets of 12 Reps): Perform light internal and external rotations using a light resistance band to warm up your shoulder capsules.
- The 60-Second Wrist Reset (1 Set per Hand): Execute the four-step isometric wrist sequence to lock in joint stacking and wake up your forearm stabilizers.
- Empty Barbell Warm-Up Sets (2 Sets of 10 Reps): Focus on crushing the bar hard, positioning it over the heel of your palm, and keeping your knuckles pointing slightly upward toward the ceiling.
Related Articles
- Forget Painkillers: These 10 Stretches Relieved My Lower Back Pain Faster Than Anything Else
- Bad Posture and Weak Knees? The Hamstring Secret Trainers Use to Protect Joints
- A Physical Therapist’s Top Resistance Band Exercises to Stop Joint Pain in Its Tracks
- Loosen Tight Hips Fast: A Personal Trainer’s Flexibility Secret Revealed
- This Posture Hack Fixes Shoulder Tension in Just 60 Seconds, According to a Physical Therapist