FREE SHIPPING OVER $50
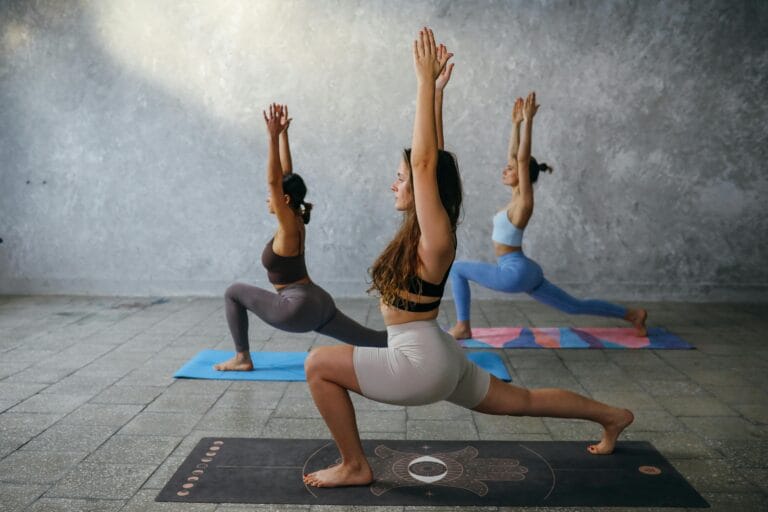
Sore After Workouts? These 10 Cool-Down Exercises Ease Pain and Boost Flexibility Fast
You just crushed your workout. You feel powerful, energized, and ready to take on the world. But then, it starts. First, a slight tightness in your legs. The next morning, it’s a full-on ache, making it a struggle to walk down the stairs. You’re familiar with this feeling, the dreaded muscle soreness that can last for days, making you dread your next workout and slowing down your progress.
But what if this pain isn’t a necessary evil of fitness? What if it’s a clear sign that you are skipping the single most important part of your fitness routine? The truth is, a proper cool-down is not just an optional extra; it’s a non-negotiable step to ease pain and unlock a new level of performance and flexibility. We’re going to dive into the science of muscle soreness and reveal 10 expert-backed cool-down exercises that will transform your recovery and get you back to your best, faster.
The Science of Soreness: Why You Need to Cool Down
Many people believe that muscle soreness, also known as Delayed Onset Muscle Soreness (DOMS), is caused by a buildup of lactic acid. That’s a common myth. In reality, DOMS is a result of microscopic tears in your muscle fibers, which occur naturally during intense exercise. This is a normal part of the process of building strength and is actually a good sign that your muscles are getting stronger. However, a proper cool-down is what helps your body recover from these tears.
- Lowering Your Heart Rate: During a workout, your heart rate and blood flow are elevated. A gradual cool-down helps to bring both of them back to a normal resting state.
- Flushing Out Waste: As you stretch, you help to move blood through your muscles, which can help to clear metabolic waste products that accumulate during exercise.
- Reducing Tension: A proper cool-down can help to relieve tension in your muscles and joints, preventing the stiffness and tightness that can lead to soreness.
The 10 Cool-Down Exercises for Less Pain and Better Flexibility
These cool-down exercises are all static stretches, meaning you hold each pose for a period of time. It’s important to save these for after your workout, as doing them before can increase your risk of injury. Hold each stretch for 30-60 seconds, and remember to listen to your body. You should feel a gentle stretch, not sharp pain.
1. Child’s Pose
This is the perfect way to begin your cool-down. It’s a gentle, restorative pose that stretches your back, hips, and shoulders.
- How to do it: Kneel on a mat with your big toes touching. Lower your hips back toward your heels and reach your arms out in front of you. Rest your forehead on the floor and breathe deeply.
2. Cat-Cow Stretch
This dynamic stretch is excellent for improving the flexibility and mobility of your spine.
- How to do it: Get on your hands and knees in a tabletop position. Inhale as you drop your belly and lift your head (Cow Pose). Exhale as you round your spine and tuck your chin to your chest (Cat Pose). Repeat slowly for 5-10 breaths.
3. Standing Quad Stretch
This simple stretch is essential for targeting the quadriceps, the large muscles on the front of your thighs that work hard in almost every workout.
- How to do it: Stand near a wall or chair for balance. Bend one leg and grab your ankle, gently pulling your heel toward your glute. Keep your knees together and your back straight.
4. Standing Hamstring Stretch
Your hamstrings can get very tight after a workout, so this stretch is crucial for relieving tension.
- How to do it: Stand with your feet hip-width apart. Extend one leg forward with your heel on the floor, keeping your toes pointed up. Gently hinge at your hips, keeping your back straight, and rest your hands on your bent leg.
5. Supine Figure-Four Stretch
This is a fantastic stretch for your glutes and hips, which can get incredibly tight from squats, lunges, and running.
- How to do it: Lie on your back with your knees bent. Cross one ankle over the opposite thigh just below the knee. Gently grab the back of the bent thigh and pull it toward your chest until you feel a deep stretch in your glute. Repeat on the other side.
6. Lying Spinal Twist
This gentle twist helps to relieve tension in your lower back and promote spinal flexibility.
- How to do it: Lie on your back with your knees bent and your feet on the floor. Extend your arms out to the sides in a T-shape. Gently lower both knees to one side, keeping your shoulders on the floor. Hold and then switch to the other side.
7. Pigeon Pose
This pose is a deeper hip opener that is incredibly effective for releasing tension in the hips and glutes.
- How to do it: From a tabletop position, bring one knee forward toward your wrist. The shin should be on an angle, with your ankle closer to the opposite wrist. Extend your other leg back behind you. Hinge forward and rest your head on the floor or a block. Repeat on the other side.
8. Butterfly Stretch
This stretch targets your inner thighs and groin, an area that can often be overlooked.
- How to do it: Sit on the floor with the soles of your feet touching. Let your knees fall open to the sides. Gently lean forward to deepen the stretch.
9. Tricep Stretch
This is a simple but effective stretch for the back of your arms, which can get sore from pushups, planks, and other upper body exercises.
- How to do it: Stand tall or sit. Raise one arm straight up and bend it at the elbow, bringing your hand behind your head. Use your other hand to gently pull your elbow back to deepen the stretch.
10. Chest Stretch
This stretch is essential for anyone who does a lot of pushing movements or spends time hunched over a desk.
- How to do it: Stand in a doorway and place your forearms on the doorframe. Step one foot forward and gently lean into the stretch, opening your chest and shoulders.
Putting It All Together: Your 10-Minute Cool-Down Routine
Aim to complete this routine after every workout. The key is to make it a non-negotiable part of your fitness routine.
- Start with a calming transition: Finish your workout and walk around for a minute or two to let your heart rate come down.
- Perform each stretch: Hold each of the 10 stretches above for 30-60 seconds. Take your time moving from one to the next, breathing deeply into each stretch.
- Breathe: Focus on your breath throughout the entire cool-down. Inhale to lengthen your spine, and exhale as you gently move deeper into the stretch.
The Science of Stretching: Static vs. Dynamic
It’s important to understand the difference between static and dynamic stretching to know when to use each.
- Dynamic Stretching: This involves moving through a range of motion, like arm circles or leg swings. It’s best used as part of your warm-up before an exercise session. It prepares your muscles for movement.
- Static Stretching: This involves holding a stretch for a period of time. It’s best used as part of your cool-down after an exercise session. It helps to improve flexibility and can aid in muscle recovery.
Making It a Habit: Tips for a Better Cool-Down
Skipping the cool-down is an easy trap to fall into, especially when you are short on time. Here’s how to make it stick:
- Treat It as Part of the Workout: Don’t think of your cool-down as optional. Schedule it into your workout time.
- Make It a Mindful Moment: Use this time to connect with your body and thank it for the workout.
- Find a Dedicated Space: A quiet corner of your living room or a mat at the gym can be your cool-down spot.
Conclusion
The frustrating pain of muscle soreness is not a badge of honor. It is a signal from your body that you need to be intentional about recovery. By adding a proper cool-down to your fitness routine, you are not just reducing pain; you are actively improving your flexibility, enhancing your performance, and building a healthier relationship with your body. Take those extra 10 minutes. Your muscles will thank you, and your body will be ready to tackle the next challenge with less pain and more power.
Related Articles
- Over 60 and Fitter Than Most 30-Year-Olds—This Couple’s At-Home Routine Is Shocking Trainers
- Beginner to Fit in 30 Days—No Gym, No Excuses, Just Results
- 30 Days. 3,000 Biceps Curls. The Results Were Not What I Expected
- The Swiss Ball Leg Curl: The One Move That Builds Hamstrings and Core—Fast
- Over 50 and Not Seeing Muscle Gains? Here’s the #1 Mistake—and How to Fix It Fast
- Harvard-Backed Japanese Walking Method That Balances Blood Sugar and Pressure Naturally